SkoolKit

Spectrum game disassembly toolkit

Two sides of the same tape

SkoolKit 9.6 has been released. To get a copy, please head over to the download page, the Python Package Index, or GitHub.

Although tap2sna.py has recently transformed into something that’s actually easy to use (thanks to the introduction of a Z80 instruction set simulator in SkoolKit 8.7), it still lacks a couple of abilities that would make it even more useful: loading from two tape files (as when side 1 and side 2 are in separate files), and simulating keypresses while a tape is loading. Until now, that is.

If you do happen to be trying to load one of those annoying games that require both sides of a tape that are in two different files, you can now do the natural thing and supply each filename as an argument:

$ tap2sna.py side1.pzx side2.pzx

And if you happen to be trying to load one of those even more annoying games that require you to stop the tape for no good reason at some point in the middle of a load, and then press a key and start the tape again to continue loading, the new --press option is there to help. For example:

$ tap2sna.py --press 5:ENTER more-annoying-game.tap

This will stop the tape when block 5 is reached, simulate pressing the ENTER key until the row containing that key has been read, and then resume playing the tape. If more than one keypress is required before the tape can resume playing, don’t worry: --press can simulate as many as are needed.

And as a bonus, if you happen to be trying to load one of those annoyingest games of all that require you to stop the tape at some point and do some fast-forwarding before continuing the load - yes, such games, though rare, do exist - then the new --tape-skip option comes to the rescue. It can fast forward over one or more blocks like this:

$ tap2sna.py --tape-skip 4-5 annoyingest-game.tzx

In other tape-related news, 12 new tape-sampling loop accelerators have been added, and tap2sna.py can now accelerate both types of ‘DEC A’ delay loop (the more common one that ends with ‘JR NZ’, and the less common one that ends with ‘JP NZ’) at the same time, instead of just one or the other exclusively.

But if all of that fails to capture your interest, perhaps SkoolKit 9.6’s new component - the RST handler - can fail to capture it even more. As its name suggests, it handles RST instructions, which means it can alert its consumer - sna2ctl.py or sna2skool.py - that a byte or word argument follows. To activate the RST handler, use the new --handle-rst option:

$ sna2ctl.py --handle-rst --org 0 some-rom.bin

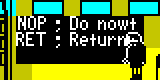
By default, the stock RST handler recognises the byte argument of ‘RST $08’ instructions, and nothing else - which is useful (if at all) only for the 48K ROM. But it can be configured to recognise the byte or word argument of any RST instruction by setting the RSTHandlerConfig configuration parameter in the [skoolkit] section of skoolkit.ini, in case you’re interested in disassembling some other ROM.

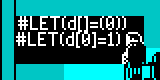
When used with sna2ctl.py, the RST handler inserts B (byte) and W (word) sub-block directives as appropriate immediately after the RST instructions of interest. But if you want to bypass the control file stage and go straight to disassembling a ROM image, you can activate the RST handler thus:

$ sna2skool.py --handle-rst --org 0 some-rom.bin

When used with sna2skool.py, the RST handler inserts DEFB and DEFW statements as appropriate immediately after the RST instructions of interest. Note that the RST handler only needs to be invoked once on any ROM image or snapshot; if you use it with sna2ctl.py to generate a control file, and then again with sna2skool.py on that same control file, confusion will result - both for sna2skool.py and for you. You have been warned.

For details of the other new features that have nothing to do with loading tapes or recognising the arguments of RST instructions, visit the changelog. Once you’re done there, grab a copy of 9.6 and see how much quicker tap2sna.py is now at loading Basil or Lone Wolf.

No instruction left uncommented

On the 15th anniversary of the release of SkoolKit 1.0, SkoolKit 9.5 has been released. To get a copy, please head over to the download page, the Python Package Index, or GitHub.

When it comes to annotations, SkoolKit has always stayed out of the way and allowed the reverse engineer (that’s you) free rein to decide where to place comments in the skool file and how to word them. Which is how it should be, because only the reverse engineer (that’s you again) really understands what the code is doing and how to convey that information to a reader of the disassembly. However, if you’ve ever, when starting a new disassembly project, been filled with dread by the daunting sight of a completely bare skool file, then SkoolKit 9.5 is here to help (a little). New in this release is a comment generator component, which can be enabled by using the --comments (or -C) option of sna2ctl.py or sna2skool.py. For example:

$ sna2ctl.py -C game.z80 > game.ctl

Now take a look at game.ctl and revel in the ready-made comments that describe what each individual instruction is doing. What if you’ve already started on a control file, for which sna2ctl.py did not employ the comment generator? No problem. sna2skool.py can use it to generate comments for the instructions that don’t yet have any:

$ sna2skool.py -C -c game.ctl game.z80 > game.skool

Of course, the comment generator is not in any way smart, doesn’t understand how the game you’re disassembling actually works, and should never be used to produce a ‘complete’ disassembly automatically from scratch. But if you’re a bit hazy on how an arithmetic or logic operation works on the flags, or what one of the rarely used instructions (e.g. RLD or OTIR) actually does, then the comment generator can provide a useful jog to the memory. Which is better than nothing.

If, by chance and over time, you find the comment generator to be more useful than not, you can enable it by default for both sna2ctl.py and sna2skool.py by setting their Comments configuration parameters to 1 in skoolkit.ini.

Anyway, moving on to other new features, trace.py, when running with screen contents displayed, will now respond to keypresses. This means you could use it to enter programs into the simulated ZX Spectrum, or even play games, though I wouldn’t recommend it. With no border, or sound, or menus to control its operation, trace.py is a poor substitute for a proper emulator. But in a pinch it could be useful if the code you’re tracing depends on user input.

Another new feature for trace.py - which makes more sense now that it can respond to keypresses - is the --map option. Just like the --map option of rzxplay.py, it produces a code execution map. And, just like a code execution map produced by rzxplay.py, one produced by trace.py can be used with the --map option of sna2ctl.py when generating a control file.

Finally, with an eye to the looming SkoolKit 10.0 (no release date planned yet, so don’t panic), there are several macro-related deprecations in the works in this release. They all concern syntax oddities that have been around for a long time, and which I’m now determined to eradicate (eventually) by encouraging the use of parentheses where appropriate. Specifically, #CALL, #LINK and #FONT now support alternative syntaxes that do away with the ugly colons, and the new #FRAMES macro is an aptly named drop-in replacement (more or less) for the frame-splicing #UDGARRAY* macro that avoids the weird asterisk. In addition, the plain #UDGARRAY macro now strongly prefers its UDG specifications to be enclosed in parentheses, and its attribute address range specifications to be enclosed in square brackets.

For details of the other new features that may or may not be overshadowed by the comment generator, check out the changelog. After that, why not download a copy of 9.5 and use the comment generator to remind yourself what RRD and INIR do, and how ‘RET C’ works after a CP?

Tracing with a screen near you

SkoolKit 9.4 has been released. To get a copy, please head over to the download page, the Python Package Index, or GitHub.

With the 9.x series well under way, and full 128K support (9.0 and 9.1), RZX support (9.2) and PZX support (9.3) now firmly entrenched, 9.4 quite reasonably steps down a gear and modestly introduces some minor enhancements to the Skoolkit commands and skool macros that we have come to know and love.

First, the --screen option of trace.py. As its name suggests, it displays the contents of the Spectrum’s screen while code is executing (so long as you have pygame installed). This can help if you want to produce a snapshot at a particular point that’s easier to judge by eye than by, say, the number of instructions executed (--max-operations) or the number of T-states elapsed (--max-tstates).

By default, the screen is refreshed at a rate of 50 frames per second (i.e. normal Spectrum speed), but that can be changed by setting the ScreenFps configuration parameter. A value of 0 sets trace.py (and screen updates) running at maximum speed. Also by default, the screen is rendered with a scale factor of 2 (i.e. 512x384 pixels), but that can also be changed by setting the ScreenScale configuration parameter.

In addition to writing a snapshot file or WAV file after code execution has completed, trace.py can now write a PNG image file of the screen contents. Or, indeed, all three at the same time, now that multiple output file arguments are allowed. By default, the image scale factor is 2 (i.e. 512x384 pixels again), but that can be changed by setting the PNGScale configuration parameter.

In other command news, skool2bin.py can now read configuration from skoolkit.ini, and can also pad its output with zeroes on the left by using the PadLeft configuration parameter, or (perhaps more usefully) on the right by using the PadRight configuration parameter. So if PadRight is set to 65536, you can (for example) use bin2sna.py on the output of skool2bin.py without ever having to specify the origin address.

Turning now to skool macros, this release bestows upon #FOREACH support for a new special variable: POKEname. This expands to a list of the POKEs made by the #POKES macro on the named snapshot created by the #PUSHS macro. For example, if the udgfix snapshot has three POKEs:

#PUSHSudgfix #POKES30000,1;30001,2;30002,3 #UDG30000 #POPS

then:

#FOREACH(POKEudgfix)(p,p,: )

would expand to:

POKE 30000,1: POKE 30001,2: POKE 30002,3

Individual POKEs and subsequences of POKEs on a snapshot can be specified by using Python’s square brackets notation for indexing ([i]) and slicing ([start:stop]) a list. For example, POKEudgfix[0] yields the first POKE, and POKEudgfix[1:] yields every POKE but the first.

There are more new features to discover, but for details on those and the bug fixes in SkoolKit 9.4, head over to the changelog. When you’re finished there, get a copy of 9.4 and start rendering POKE lists with absolute precision.